Switch vDS PGs to LAG uplink

Recently I needed to configure LACP on a distributed switch that was already setup. With about 20 PortGroups (VLANs) already configured, the idea of clicking through each one to update the uplinks to the LAG from the standard uplinks sounded really boring.

I found this post by Ben Liebowitz on automating the creation of new port groups and stole the peices that I needed to just update the PortGroup active uplinks. So here it is.

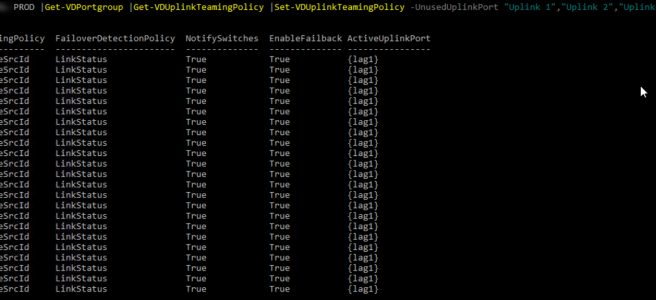
Get-VDSwitch vDS-SwitchName |Get-VDPortgroup |Get-VDUplinkTeamingPolicy |Set-VDUplinkTeamingPolicy -UnusedUplinkPort "Uplink 1","Uplink 2","Uplink 3","Uplink 4" -ActiveUplinkPort lag1

Afterwards, I realised that it also updated the the active uplinks on the uplink port group. This change is not visible in the GUI and I’m not sure what the impact of this is but I figured that reverting it back was the best plan. So here is the command for that, if you were going to roll this out multiple times it would probably be a good idea to filter the above command based on the name of the uplink portgroup to avoid this change.

Get-VDSwitch vDS-SwitchName |Get-VDPortgroup vDS-SwitchName-DVUplinks |Get-VDUplinkTeamingPolicy |Set-VDUplinkTeamingPolicy -UnusedUplinkPort "Uplink 1","Uplink 2","Uplink 3","Uplin
k 4",lag1

Clear HA alarm on all VMs

Recently I ran into an issue where HA triggered on a cluster but failed. This generated an alert on several hundred VMs. Hating to click each one to reset the alarm that wasn’t clearing I found the following solution.

  1. PowerCLI to vCenter
  2. Run the following command to disable the alarm
  3. Get-AlarmDefinition "vSphere HA virtual machine failover failed" |Set-AlarmDefinition -Enabled:$false
  4. The alarm should clear almost instantly for all VMs
  5. Re-enable the alarm
  6. Get-AlarmDefinition "vSphere HA virtual machine failover failed" |Set-AlarmDefinition -Enabled:$true

Bi-Directional Packet Capture on ESXi

I recently ran into an issue where we needed to capture some packets from the vmk interface on a Nutanix/vSphere host. I found this great utility for that, pktcap-uw, however it only captures traffic in one direction by default. Thankfully I found someone with the info on how to run both incoming and outgoing captures at the same time.

  1. SSH to the host
  2. Update the cmd below to reflect your vmk port or whatever you are trying to capture
  3. Run this cmd
  4. pktcap-uw --vmk vmk0 --dir 0 -o /tmp/vmk0_in.pcap & pktcap-uw --vmk vmk0 --dir 1 -o /tmp/vmk0_out.pcap &
  5. Shut down the capture after your done with this cmd
  6. kill $(lsof |grep pktcap-uw |awk '{print $1}'| sort -u)
  7. Use WinSCP to connect to the host
  8. Copy vmk0_in.pcap & vmk0_out.pcap files from /tmp/*
  9. Save them somewhere useful
  10. Open in wireshark
  11. Click File > Merge > pick the 2nd file
  12. And you should be presented with a capture with both incoming and outgoing packets.

Using the pktcap-uw tool in ESXi 5.5 and later (2051814)

@beandrew – his reply is what got this working for me

Securing VMs

So you enabled the vSphere Compliance module in vRealize Operations Manager and now your VMs are all reporting the following alert.

“Virtual Machine is violating Risk Profile 1 in VMware vSphere Security Configuration Guide”

Viewing the details shows symptoms similar to the following:

0017

I’m not going to cover the details on what each setting does but for the most part these are safe to run, however if your are concerned about what it might do you should test it for yourself.

Note: This will not remove the floppy drive since the VM needs to be powered down and I didn’t need to disable that for many of the VMs when I built this.

#Selecting the target VMs
$vms = Get-VM
#Looping through each VM and setting the value, to rollback change TRUE to FALSE and re-run the script
foreach ($vm in $vms) {
New-AdvancedSetting -Entity $vm -Name isolation.bios.bbs.disable -Value TRUE -Confirm:$false -Force:$true
New-AdvancedSetting -Entity $vm -Name isolation.device.connectable.disable -Value TRUE -Confirm:$false -Force:$true
New-AdvancedSetting -Entity $vm -Name isolation.device.edit.disable -Value TRUE -Confirm:$false -Force:$true
New-AdvancedSetting -Entity $vm -Name isolation.ghi.host.shellAction.disable -Value TRUE -Confirm:$false -Force:$true
New-AdvancedSetting -Entity $vm -Name isolation.tools.autoInstall.disable -Value TRUE -Confirm:$false -Force:$true
New-AdvancedSetting -Entity $vm -Name isolation.tools.diskShrink.disable -Value TRUE -Confirm:$false -Force:$true
New-AdvancedSetting -Entity $vm -Name isolation.tools.diskWiper.disable -Value TRUE -Confirm:$false -Force:$true
New-AdvancedSetting -Entity $vm -Name isolation.tools.dispTopoRequest.disable -Value TRUE -Confirm:$false -Force:$true
New-AdvancedSetting -Entity $vm -Name isolation.tools.getCreds.disable -Value TRUE -Confirm:$false -Force:$true
New-AdvancedSetting -Entity $vm -Name isolation.tools.ghi.autologon.disable -Value TRUE -Confirm:$false -Force:$true
New-AdvancedSetting -Entity $vm -Name isolation.tools.ghi.launchmenu.change -Value TRUE -Confirm:$false -Force:$true
New-AdvancedSetting -Entity $vm -Name isolation.tools.ghi.protocolhandler.info.disable -Value TRUE -Confirm:$false -Force:$true
New-AdvancedSetting -Entity $vm -Name isolation.tools.ghi.trayicon.disable -Value TRUE -Confirm:$false -Force:$true
New-AdvancedSetting -Entity $vm -Name isolation.tools.guestDnDVersionSet.disable -Value TRUE -Confirm:$false -Force:$true
New-AdvancedSetting -Entity $vm -Name isolation.tools.hgfsServerSet.disable -Value TRUE -Confirm:$false -Force:$true
New-AdvancedSetting -Entity $vm -Name isolation.tools.memSchedFakeSampleStats.disable -Value TRUE -Confirm:$false -Force:$true
New-AdvancedSetting -Entity $vm -Name isolation.tools.trashFolderState.disable -Value TRUE -Confirm:$false -Force:$true
New-AdvancedSetting -Entity $vm -Name isolation.tools.unity.disable -Value TRUE -Confirm:$false -Force:$true
New-AdvancedSetting -Entity $vm -Name isolation.tools.unity.push.update.disable -Value TRUE -Confirm:$false -Force:$true
New-AdvancedSetting -Entity $vm -Name isolation.tools.unity.taskbar.disable -Value TRUE -Confirm:$false -Force:$true
New-AdvancedSetting -Entity $vm -Name isolation.tools.unity.windowContents.disable -Value TRUE -Confirm:$false -Force:$true
New-AdvancedSetting -Entity $vm -Name isolation.tools.unityActive.disable -Value TRUE -Confirm:$false -Force:$true
New-AdvancedSetting -Entity $vm -Name isolation.tools.unityInterlockOperation.disable -Value TRUE -Confirm:$false -Force:$true
New-AdvancedSetting -Entity $vm -Name isolation.tools.vixMessage.disable -Value TRUE -Confirm:$false -Force:$true
New-AdvancedSetting -Entity $vm -Name isolation.tools.vmxDnDVersionGet.disable -Value TRUE -Confirm:$false -Force:$true
New-AdvancedSetting -Entity $vm -Name isolation.monitor.control.disable -Value TRUE -Confirm:$false -Force:$true
New-AdvancedSetting -Entity $vm -Name tools.setInfo.sizeLimit -Value "1048576" -Confirm:$false -Force:$true
New-AdvancedSetting -Entity $vm -Name vmci0.unrestricted -Value FALSE -Confirm:$false -Force:$true
Get-CDDrive -VM $vm |Set-CDDrive -StartConnected:$false -NoMedia -Connected:$false -Confirm:$false
}


Compliance Alert on Uplink dvPortGroups

Just a quick note on a recent discovery.

When using the vSphere Security Configuration policy in vRealize Operations Manager you may see an alert similar to the following.

RP 1,2,3 – vNetwork.reject-forged-transmit-dvportgroup – The Forged Transmits policy is not set to reject

vrops-security-alert

Checked the config for the security policy on the port groups using:

Get-VDPortgroup | Get-VDSecurityPolicy

After some digging I found that Forged Transmits is enabled on uplink port groups by default but not on regular port groups. This is because the uplink ports will need to pass traffic (VM, management, etc…) for MACs that are not on the interface.

This alert is a false positive and should be excluded from the compliance checker. Time permitting I will follow up with info on how to do this.

tl;dr – don’t disable forged transmits on uplink port groups, something will break

Here is some good background info on forged transmits: http://wahlnetwork.com/2013/04/29/how-the-vmware-forged-transmits-security-policy-works/

Someone else with the same issue: https://communities.vmware.com/thread/577449


Reset ESXi root account w/ PowerCLI

This method of resetting the root password does not require you to know the existing password and is a lot easier that setting up a host profile to change the passwords.

Original script source & writer – the best script is one someone else already wrote 🙂

# https://www.linkedin.com/pulse/reset-esxi-root-password-through-vcenter-esxcli-method-buschhaus
# First, setup $vmhosts. You can do this many ways.$vmhosts = Get-Cluster -Name ClusterWithUnknownPassword | Get-VMHost
# Just so it contains one or more VMHost objects.
# To reset all ESXi host passwords use
# $vmhosts = Get-VMHost
# $vmhosts = Get-Cluster -Name "Cluster Name" | Get-VMHost

# Since this only works on ESXi 6 and up I used this option to skip the 5.5 hosts that will error out. -AD
$vmhosts = get-vmhost |Where-Object {$_.Version -eq '6.0.0'}

# This will prompt for the new root password -AD
$NewCredential = Get-Credential -UserName "root" -Message "Enter an existing ESXi username (not vCenter), and what you want their password to be reset to."
Foreach ($vmhost in $vmhosts) {
    $esxcli = get-esxcli -vmhost $vmhost -v2 #Gain access to ESXCLI on the host.
    $esxcliargs = $esxcli.system.account.set.CreateArgs() #Get Parameter list (Arguments)
    $esxcliargs.id = $NewCredential.UserName #Specify the user to reset
    $esxcliargs.password = $NewCredential.GetNetworkCredential().Password #Specify the new password
    $esxcliargs.passwordconfirmation = $NewCredential.GetNetworkCredential().Password
    Write-Host ("Resetting password for: " + $vmhost) #Debug line so admin can see what's happening.
    $esxcli.system.account.set.Invoke($esxcliargs) #Run command, if returns "true" it was successful.
}