Finding Unlicensed Users in O365

Use these commands to check which users don’t have a license or need a different license. This is different from the search/filter in the Admin portal because it checks for the LicenseReconciliationNeeded attribute rather than IsLicensed. For example if you have a user with an Azure AD P2 license but they need an Exchange Online license the admin portal doesn’t give you a good way to filter this out.

#get connected
Connect-MsolService

#show list of users that we need to license
get-msoluser -All | where {$_.LicenseReconciliationNeeded -eq $true}

#show the availible licenses that we have in the tenant, we are going to be looking for the E3 license "tenantnamehere:ENTERPRISEPACK"
Get-MsolAccountSku

#assign a usage location to the users we are going to license
get-msoluser -All | where {$_.LicenseReconciliationNeeded -eq $true} |Set-MsolUser -UsageLocation "US"

#assign the licenses to the users
get-msoluser -All | where {$_.LicenseReconciliationNeeded -eq $true} |Set-MsolUserLicense -AddLicenses "tenantnamehere:ENTERPRISEPACK"

Your users should be all set with their new licenses.

Finding SMTP Relay Senders

To start with check to see if practical365.com is still live, this site has a more comprehensive look at what we are doing here.

Here is the sort version of what you need to do.
#Show current settings for connectors listening on port 25

Get-ReceiveConnector |where {$_.Bindings -like "*:25"} |ft Identity,ProtocolLoggingLevel

#Set logging to verbose for all of those connectors, make sure you aren't low on free space. It shoudn't take up much but make sure

Get-ReceiveConnector |where {$_.Bindings -like "*:25"} |ft Identity,ProtocolLoggingLevel |Set-ReceiveConnector -ProtocolLoggingLevel verbose

#Wait a day or whatever interval you think is sufficient to get a connection from all the lines of business apps

#Install Log Parser 2.2 on your hub transport servers
https://www.microsoft.com/en-us/download/details.aspx?id=24659

#Browse to your log dir, on my server I had to elevate permissions before it would let me navigate to the dir

#Open CMD and browse to the log dir
cd "D:\Program Files\Microsoft\Exchange Server\V14\TransportRoles\Logs\ProtocolLog\SmtpReceive"

#Run the following cmd
"C:\Program Files (x86)\Log Parser 2.2\logparser.exe" "SELECT EXTRACT_PREFIX(remote-endpoint,0,':') as IP,REVERSEDNS(EXTRACT_PREFIX(remote-endpoint,0,':')) as Name,Count(*) as Hits from *.log WHERE data LIKE '%EHLO%' GROUP BY IP ORDER BY Hits DESC" -i:CSV -nSkipLines:4 -rtp:-1

#It should return a table like this

After performing these steps on all of the hub transport servers that are relay targets you would want to update these devices to send though your new relay. Once they are all updated you can clear the logs and re-run this process to make sure it all worked.

VMware Cloud on AWS Connectivity

VMware Cloud on AWS Connectivity

VMware Cloud on AWS Connectivity

VMware Cloud on AWS Connectivity Welcome back! This is the third blogpost in our series about getting started with VMware Cloud on AWS as a vSphere administrator. So far we’ve discussed the VMware Cloud on AWS offering, then we moved on to setting up the AWS customer VPC and deploying the VMware Cloud on AWS The post VMware Cloud on AWS Connectivity appeared first on VMware vSphere Blog.


VMware Social Media Advocacy

Check Point Lab – Management Setup

I needed to setup a new R80.30 management server for my lab. Here is the setup process. I started this on VMware Workstation 15 on my laptop, & will eventually export it to a vSphere host.

*It should be noted that this is a lab setup and may not reflect the best decisions for a production setup

Create a new custom VM

Left the default compatibility settings

Install OS later

Picked the 3.x linux kernel

Pick the location

Pick cores & memory

Select bridged mode

Keep defaults (next, next, next)

Set 100GB thin provisioned HD

Keep defaults (next)

Confirm & Finish

Download the ISO for a “clean install”, mgmt server https://supportcenter.checkpoint.com/supportcenter/portal?eventSubmit_doGoviewsolutiondetails=&solutionid=sk144293#Downloads

Boot from the downloaded ISO, click OK

Pick keyboard layout

Keep defaults (ok)

Set password

Set IP and DHCP server if needed

Confirm

Waiting…

Reboot

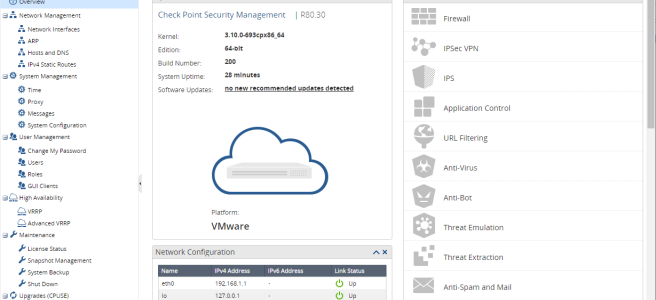
Login to the Gaia web interface

https://192.168.1.1/

admin\password

Run through the first time setup wizard

Keep defaults (next, next… …finish)

We are finally finished with the initial setup!!!

Login to Gaia https://192.168.1.1

You can download the new version of Smart console from here and start managing your lab.

*If I had deployed this on the vSphere host I should have been able to use VMXNET3 NIC this KB documents that change/process

https://supportcenter.checkpoint.com/supportcenter/portal?eventSubmit_doGoviewsolutiondetails=&solutionid=sk110686

O365 – Tenant Name Checker

Over the years I have had the opportunity to work on quite a few Office 365 migrations and setups. This post covers somethings that I have found useful to ensuring a successful migration and making day 2 operations easier.

Picking the Name

So the tenant name (contoso.onmicrosoft.com) does’t show up in too many places but it will be visible to some users. Mainly when you are looking at Team sites or SharePoint, but also in the aliases for hybrid setups. Bottom line you won’t have to type it in all the time but you probably don’t want to pick something like (myfavpet.onmicrosoft.com) because someone will eventually ask and you can’t change it, ever. This tool will let you quickly check the available tenant names without having to go through the setup processes, you can send this over to the people that care and get them to pick the name for you. As you can see myfavpet is available and ready for your new migration 🙂

link: https://o365.rocks/

*I’m not sure exactly who the source is, but thank you to who ever is working at NOBL.TECH that created this!

VMware to Acquire Bitnami

VMware announces intent to acquire Bitnami, a leader in application packaging for multi-cloud environments. Find out how #Bitnami will help #VMware accelerate our #multi-cloud and #Kubernetes offerings and efforts!

VMware to Acquire Bitnami

Organizations today are on a multi-cloud journey, and VMware is committed to investing in solutions that address the core needs of our customers. In that spirit, VMware is announcing its intent to acquire Bitnami, a leader in application packaging solutions providing the largest catalog of click-to-deploy applications and development stacks for major cloud and Kubernetes The post VMware to Acquire Bitnami appeared first on VMware Cloud Community.


VMware Social Media Advocacy

Exchange: ActiveSync for Admins

While having an admin account for your primary mailbox isn’t a great idea for a lot of good reasons, it is sometimes helpful to have for testing.

If you happened to get your admin account by copying the default admin account in AD or maybe you copied another admin you may notice that you mailbox doesn’t work on your phone. I’ve seen people freak out during maintenance windows “testing” with their admin account and finding that mobile access isn’t working. There are two things that you can do to fix this.

  1. Stop coming up with the test during the maintenance window. I have had good experience putting them in the change request so that everyone is on the same page for how success is measured. This also means that if the change doesn’t work it was because X failed not because YOU failed. Perception can go for a lot and change windows can have a lot of moving parts.
  2. The issue with the mailbox/account is probably that inheritance is not enabled on the account. This is not enabled by default for the admin account. Follow the steps below to enable it.

Enable inheritance on a user account

  1. Open Active Directory Users and Computer
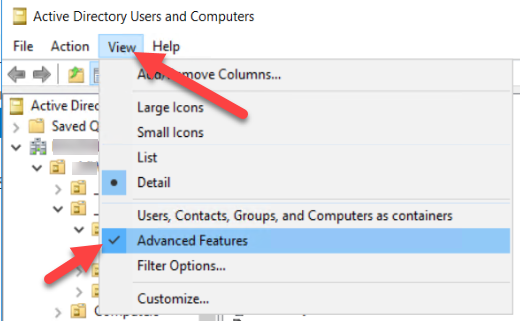
  2. Enable Advanced Features in the View menu
    • SNAG-0000.png
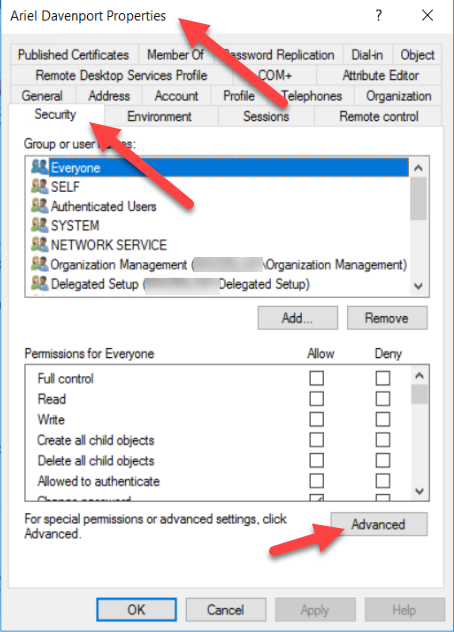
  3. Open the properties of the affected admin account
    • Select the Security tab and click the advanced button
    • SNAG-0001.png
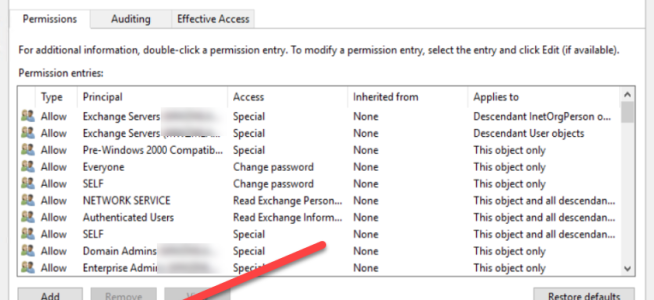
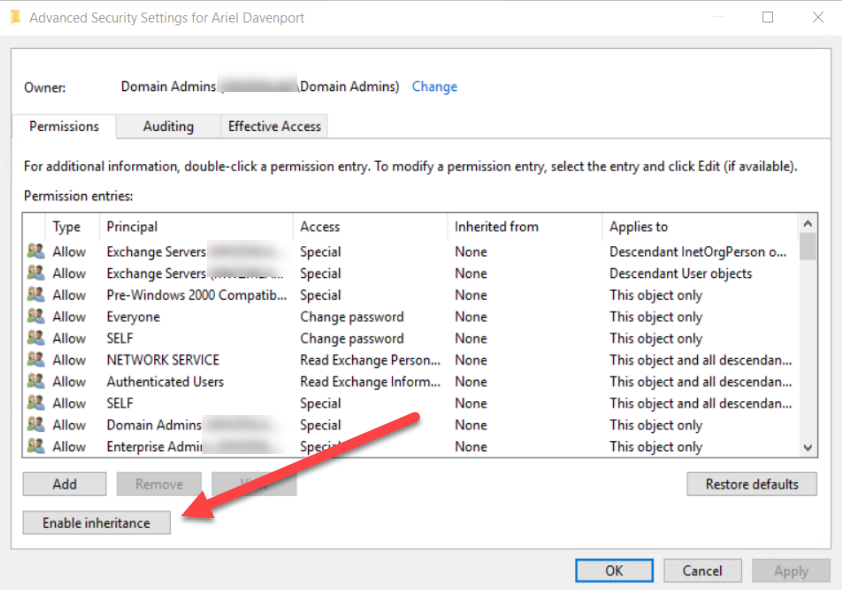
  4. Now we get to see the magic button!!! Click enable
    • SNAG-0002.png
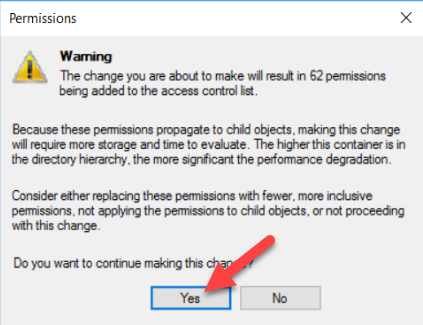
  5. You may get a warning if there are going to be a lot of additional ACLs applied. Not to worry its only our admin account 🙂 you didn’t tie it to anything else did you?
    • SNAG-0003.png
  6. Click apply or OK to save everything and close out
  7. For this I forced an AD sync to make sure that my change went out to all the servers, is was successful
    • SNAG-0004.png
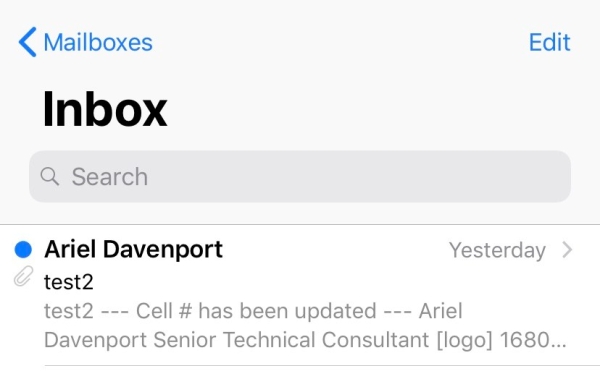
  8. Success!!!
    • It took a few minutes for my phone to update but it works now
    • img_0381


Switch vDS PGs to LAG uplink

Recently I needed to configure LACP on a distributed switch that was already setup. With about 20 PortGroups (VLANs) already configured, the idea of clicking through each one to update the uplinks to the LAG from the standard uplinks sounded really boring.

I found this post by Ben Liebowitz on automating the creation of new port groups and stole the peices that I needed to just update the PortGroup active uplinks. So here it is.

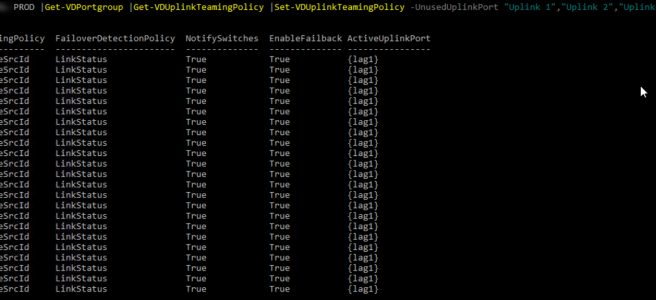
Get-VDSwitch vDS-SwitchName |Get-VDPortgroup |Get-VDUplinkTeamingPolicy |Set-VDUplinkTeamingPolicy -UnusedUplinkPort "Uplink 1","Uplink 2","Uplink 3","Uplink 4" -ActiveUplinkPort lag1

Afterwards, I realised that it also updated the the active uplinks on the uplink port group. This change is not visible in the GUI and I’m not sure what the impact of this is but I figured that reverting it back was the best plan. So here is the command for that, if you were going to roll this out multiple times it would probably be a good idea to filter the above command based on the name of the uplink portgroup to avoid this change.

Get-VDSwitch vDS-SwitchName |Get-VDPortgroup vDS-SwitchName-DVUplinks |Get-VDUplinkTeamingPolicy |Set-VDUplinkTeamingPolicy -UnusedUplinkPort "Uplink 1","Uplink 2","Uplink 3","Uplin
k 4",lag1

Clear HA alarm on all VMs

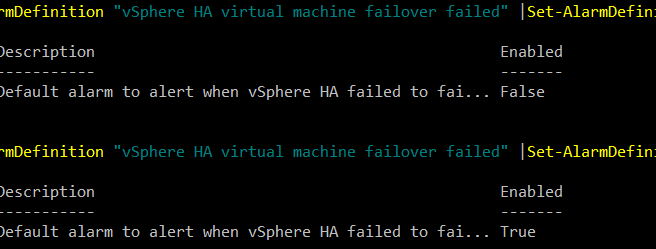
Recently I ran into an issue where HA triggered on a cluster but failed. This generated an alert on several hundred VMs. Hating to click each one to reset the alarm that wasn’t clearing I found the following solution.

  1. PowerCLI to vCenter
  2. Run the following command to disable the alarm
  3. Get-AlarmDefinition "vSphere HA virtual machine failover failed" |Set-AlarmDefinition -Enabled:$false
  4. The alarm should clear almost instantly for all VMs
  5. Re-enable the alarm
  6. Get-AlarmDefinition "vSphere HA virtual machine failover failed" |Set-AlarmDefinition -Enabled:$true